
Last Updated: October 25, 2026
Quick Summary
Vinyl window installation is the process of removing an old window and setting a new vinyl unit into the opening, sealed and fastened so it sheds water and operates smoothly. Most jobs follow the same order: protect, remove, inspect, prepare, dry fit, fasten, seal. Insert windows run about 30 to 60 minutes per window, and a whole-house job usually lands in one to three days.
- Choose insert, full-frame, or flush-fin based on how much of the old window comes out.
- Measure width and height in three places each and use the smallest number.
- If the two diagonal measurements differ by more than about 1/8 inch, note it before ordering.
- Apply flashing tape starting at the sill, work up the sides, and lap the head last.
- Installed vinyl replacement windows are commonly estimated at $300 to $1,000 per window.
Table of Contents
- Insert, Full-Frame, or Flush-Fin: Which Vinyl Window Installation Method Fits Your Home
- How to Measure for Replacement Windows Before Anything Is Ordered
- The Vinyl Replacement Window Installation Steps, Start to Finish
- Vinyl Window Installation Time: What Homeowners Should Expect
- Your Vinyl Window Installation Checklist for a Smooth Project
- When to Hire a Professional Instead of Doing It Yourself
- Troubleshooting and Final Quality Checks After Installation
- Getting a Vinyl Window Installation Quote for Your Home
- Frequently Asked Questions
Insert, Full-Frame, or Flush-Fin: Which Vinyl Window Installation Method Fits Your Home
The vinyl window installation process starts with one decision: how much of the old window comes out. According to IBISWorld’s 2026 window installation industry analysis, the U.S. window installation industry is a $7.8 billion market spread across 28,247 businesses.
Vinyl window installation is the process of removing an old window and setting a new vinyl unit into the opening, sealed and fastened so it sheds water and operates smoothly. Three methods cover nearly every home.
Insert Windows: A New Sash in the Existing Frame
An insert window drops a new sash and frame inside the existing window frame. The old frame and trim stay put. It’s faster, cheaper, and less messy.
This works when the existing frame is solid, square, and free of rot. It fails when the frame is soft or out of square.
Full-Frame and Flush-Fin: When the Whole Opening Changes
A full-frame installation removes the window, frame, and trim down to the rough opening. Flush-fin windows use a nailing flange that sits against the sheathing, so siding or trim has to come off.
Pick full-frame when the old frame is damaged or you want new interior trim. Pick flush-fin when you’re siding or remodeling anyway.
How to Measure for Replacement Windows Before Anything Is Ordered
Measure the opening width and height in three places each, then check the diagonals. If the two diagonal measurements match, the opening is square. If they differ by more than about 1/8 inch, note it before ordering.
Measure between the jambs for width and from the sill to the head for height. Take readings at the top, middle, and bottom of the height, and at the top, middle, and bottom of the width.
Our guide on how to measure windows correctly for replacement walks through the full method, including where to place the tape so the new unit fits without a fight.
The Vinyl Replacement Window Installation Steps, Start to Finish
Most vinyl replacement window installation steps follow the same order: protect, remove, inspect, prepare, dry fit, fasten, seal. Skip a step and the window may leak or stick for years.
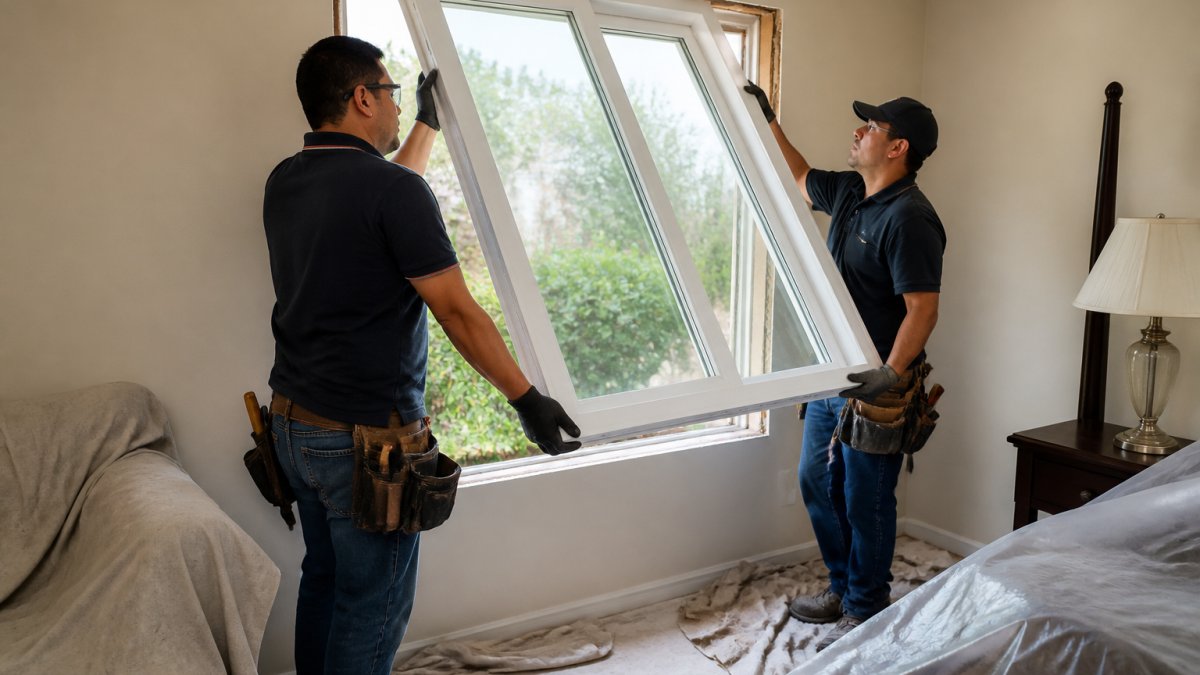
Precision during these final adjustments ensures the unit remains square and weather-tight, reflecting the technical standards required for modern window installation.
Protecting the Interior and Removing the Old Window
Lay drop cloths over furniture and floors before anything else. Pets and kids should be out of the work zone.
Cut the paint seal around the interior trim with a utility knife. Then remove the sash and carefully pry the old frame free. Two people should handle every window.
Checking the Rough Opening, Sill Prep, and Flashing Sequence
Inspect the rough opening for rot, gaps, and frame damage. Fix soft wood before the new window goes in.
Check that the opening is square, level, and plumb. Then prepare the sill: clean it, set a slight slope toward the exterior, and apply flashing tape in the right order. Start at the sill, work up the sides, and lap the head last so water sheds outward.
Dry Fitting, Shimming, Fastening, and Sealing the New Window
Dry fit the window before fastening anything. It should sit level, plumb, and square in the opening.
Shim at the sill and jambs, then fasten screws through the frame per the manufacturer’s installation instructions. Fill the air gap with insulation, not packed tight. Finish with sealant and caulk at the exterior and interior trim.
Vinyl Window Installation Time: What Homeowners Should Expect
Vinyl window installation time runs about 30 to 60 minutes per window for an insert, and longer for full-frame work. A whole-house job usually lands in one to three days.
The bigger timeline is the waiting. A Home Improvement Research Institute study on homeowner purchase planning found window and door activity averages about 46.3 weeks, with roughly half of that spent deciding.
For a closer look at scheduling, see how long a professional window installation takes.
Your Vinyl Window Installation Checklist for a Smooth Project
Use this vinyl window installation checklist before, during, and after the job:
- Confirm the installation method: insert, full-frame, or flush-fin
- Measure every opening and record the smallest width and height
- Check the diagonals for a square opening
- Clear the work area and protect floors and furniture
When to Hire a Professional Instead of Doing It Yourself
Hire a professional when the opening is out of square, the frame is rotted, or the window sits above the first floor.
A common mistake is treating a full-frame job like an insert. They’re not the same, and the wall has to be opened correctly.
If you’re weighing it out, our guide on whether to hire a professional for window installation covers the trade-offs.
Troubleshooting and Final Quality Checks After Installation
Most guides stop at “check that the window opens and closes.” That’s not a quality check, it’s a glance. Use the checklist below to verify the installation actually performs, and use the troubleshooting table to tell an installation defect from a product problem before you call anyone back.
Post-Installation Inspection Checklist
Run this on every window, ideally before the installer leaves and again after the first hard rain.
Operation and hardware
- Sash opens, closes, and locks with light hand pressure, no forcing, no rubbing.
- Lock engages smoothly and the sash meets the frame evenly at the meeting rail.
- Tilt or release mechanisms (if equipped) function and re-engage fully.
- Screen fits and sits flush in its track.
Square, level, and reveal
- Reveal (the gap between sash and frame) is even on all four sides, an uneven reveal usually means the frame is out of square or over-shimmed.
- Frame is level and plumb when checked with a 4-foot level.
- Diagonals of the installed frame match within about 1/8 inch.
Air and water sealing
- No visible gaps at interior trim, exterior trim, or the frame-to-wall joint.
- Sealant line at the exterior is continuous, tooled, and bonded, no voids, no cracks.
- Interior air seal (low-expansion foam or backer rod plus sealant) fills the gap without bowing the frame.
- Weep holes at the sill are open and unobstructed, this is the window’s drainage path.
Finish
- Interior and exterior trim is tight, mitered cleanly, and caulked at the wall joint.
- No scratches, dents, or sealant smears on the vinyl; clean with a mild cleaner, not solvents.
Troubleshooting: Installation Defect or Product Issue?
The distinction matters because it determines who fixes it, the installer or the manufacturer.
| Symptom | Likely installation cause | Likely product cause |
|---|---|---|
| Draft at the frame | Gap not insulated or sealed; missing backer rod | Failed weatherstripping; warped sash |
| Water inside after rain | Flashing sequence wrong; weep holes blocked; no sill slope | Failed seal in the unit; clogged internal weep system |
| Sash rubs or sticks | Frame out of square; over-shimmed; fasteners over-tightened | Bent sash; failed balance |
| Uneven reveal | Out-of-square opening; shims in the wrong places | Twisted frame from the factory |
| Lock won’t engage | Frame racked; sash not seated | Misaligned lock hardware |
| Condensation between panes | Not an installation issue | Seal failure in the insulated glass unit |
| Condensation on interior glass | Excess interior humidity, not a window defect | , |
Condensation between the panes is a sealed-unit failure and is generally a warranty matter. Condensation on the inside surface is usually a humidity and ventilation issue in the home, not an installation defect, don’t let it be diagnosed as one.
Performance Verification
Beyond the visual check, verify the installation performs:
- Air sealing: on a windy day, hold a hand or a smoke pencil at the frame-to-wall joint and at the sash perimeter. Steady draft means a sealing gap.
- Drainage: pour a cup of water into the sill track and confirm it exits through the weep holes to the exterior, not into the wall.
- Operation under load: open and close each sash several times and confirm it stays smooth, a sash that binds after fastening points to over-shimming or an out-of-square frame.
If a check fails, document it with a photo and a note before the installer leaves. Most installation defects are far cheaper to correct at that moment than after the trim is painted and the furniture is back.
Getting a Vinyl Window Installation Quote for Your Home
A quote should list the method, window count, measurements, and what’s included in removal and disposal. Installed vinyl replacement windows are commonly estimated at $300 to $1,000 per window, with many homeowners paying about $475 to $727, according to Matera Builders’ 2026 vinyl window cost estimate.
You can see our vinyl windows and request a free estimate, or read our step-by-step guide to getting a custom window replacement quote before you call.
Frequently Asked Questions
What are the steps in vinyl window installation?
The process runs in a fixed order: measure the opening, protect the interior, remove the old window and trim, inspect the rough opening for rot or damage, check that it is square, level, and plumb, prepare the sill and apply flashing tape, dry fit the new vinyl window, shim and fasten it, insulate the air gap, seal with caulk, then reinstall interior and exterior trim. Each step depends on the one before it, which is why rushing the flashing or dry fit causes most callbacks.
How long does vinyl window installation take?
A full replacement project, from the first consultation through finished installation, can take several weeks, with ordering time usually being the longest part. The on-site work is much shorter: a crew typically sets several windows in a day, with insert windows moving faster than full-frame jobs that involve trim and flashing work. Older homes with frame damage add time.
Can vinyl replacement windows be installed without removing the frame?
Yes. That is an insert window installation, where the old sash and balances come out but the existing window frame stays in place and the new vinyl unit fits inside it. It is faster and less invasive. Full-frame installation removes the entire frame down to the rough opening and is the better choice when the existing frame is rotted, out of square, or you want a different window size. An installer should inspect the frame before recommending one method.
How can you tell if a vinyl window was installed correctly?
Open and close every sash and check that it glides without binding. Look for even gaps around the frame, sealed interior and exterior trim, and no visible air gaps you can feel on a windy day. Check that the window is level and plumb, and confirm the flashing sits above the sill and laps correctly so water drains outward. A correctly installed vinyl window should not leak, stick, or show condensation between the panes.
The vinyl window installation process rewards preparation more than speed. If you want the measuring, flashing, and fastening done right the first time, American Windows of DFW brings over 40 years of experience and Elite Contractor status with The Good Contractors List to every project. We handle vinyl, impact, and wood windows, protect your home during the work, and finish on schedule. Get started with American Windows of DFW and get windows that fit, seal, and last.
